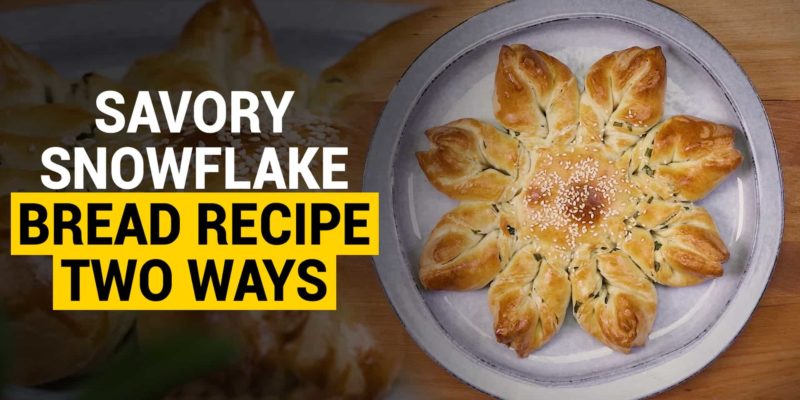
How to Make Savory Snowflake Bread Recipe (Two Ways)
These tasty snowflake bread recipes will become your latest obsession once you try them (trust us). Yes, they do need a bit of effort, but you’ll appreciate it once you get a taste of their fluffy goodness. First, we’ll make olive oil and chive bread, and next is garlic-herb-cheese butter bread. Ready to bake? Read on for the recipes!
Snowflake Bread Supplies You Need:
- 2 large bowls (1 should be an extra large deep bowl)
- 2 small bowls
- Spoon
- Measuring cups / spoons
- Whisk
- Kitchen towel
- Spatula
- Large baker’s table or cutting board
- Knife
- Roller
- Baking sheet
- Parchment paper
- Pastry brush
- Pastry cutter
- Circular cookie cutter mold
- Plastic wrap
Ingredients for the snowflake bread with olive oil and green onion:
These are the ingredients you will need to get started.
Dough ingredients
- 4 cups all-purpose flour
- 1/2 cup tapioca flour
- 1/2 teaspoon granulated sugar
- 1 teaspoon salt
- 2 teaspoons instant yeast
- 2 cups of warm milk
- 1/2 cup butter, softened
- Olive oil
Filling ingredients
- 1/2 cup chives
- A tablespoon of flour
- 1 teaspoon salt
- 1 tablespoon of olive oil
Additional features
How to make olive oil and green onion snowflake bread:
Let’s bake!
Creating the dough
- Combine all ingredients in a large bowl and beat until just combined. Next, start kneading the dough until the flour is no longer visible and forms a ball. Set aside.
- Take your extra large deep bowl and drizzle olive oil on the bottom.
- Spread it around the bowl with your hand and place the dough inside. Cover with a kitchen towel and let it rest for an hour.
- While the dough rises, combine the chives, tablespoon of flour, and salt in a small bowl. Mix the ingredients with a spoon, then add the tablespoon of olive oil. Mix the oil with the other ingredients until completely combined.
- In another small bowl, combine 1/2 cup softened butter, 1 tablespoon dried thyme, 1 tablespoon dried rosemary, and 1/2 teaspoon garlic powder. Mix with a small spoon or spatula and set aside.
- Now, let’s get back to your snowflake bread. Before you take it out of the bowl, you will want to “hit” it several times to prevent it from burning too much. Form a fist and press firmly against the dough. This removes some of the gas bubbles that form from the yeast as it rises.
- Once done, sprinkle some flour on a large cutting board or bakery table. Put the dough down and use your hands to shape it into a loaf.
- Then use your knife to cut it in half lengthwise. Take one of the halves and shape it into a square, then cut the dough into quarters.
- Roll each piece into a ball with your hands. Now, take one of the quarters and sprinkle flour on top.
- Take your rolling pin and roll out the dough until it forms a flat circle.
Adding the filling
Place on a parchment paper lined baking sheet and brush the beaten egg over the batter. Make sure you cover it well.
- Next, pour the chives and olive oil mixture from one of the bowls over the batter. Use a spoon to spread it evenly over the surface.
- Now, take another of the smaller pieces of dough that you cut in step 8. Repeat step 10, then place the flattened dough on top of the other.
- Brush the egg and chives on top of this piece as well. Add another piece of dough and repeat the process.
- Place one last piece of batter on top, but this time do not add the beaten egg or chive mixture. Instead, place a medium-sized plate upside down on top.
- Now, use a dough cutter to cut off the excess dough around the edges of the plate. Remove the plate and the excess batter.
- Next, use a circular cookie cutter to press lightly into the middle of the dough. Make sure not to press too hard, just enough to create a circular footprint.
- Then use the pastry wheel to cut the dough into quarters, starting from the outside of the circle. Make more cuts until you have sixteen pieces cut evenly. Now the snowflake bread is starting to take shape!
- Finally, take two pieces and twist them in opposite directions (one clockwise, one counterclockwise), joining them at the ends. Press them firmly together, so there is no gap between them.
- For the last step, rub the snowflake bread thoroughly with beaten egg and sprinkle sesame seeds on top. Cover with saran wrap and let stand for fifteen minutes.
Ingredients for Garlic Herb Cheese Butter Bread:
See the first recipe for the ingredients of the dough.
Fillings
- 1/2 cup butter, softened
- 1 tablespoon dried thyme
- 1 tablespoon dried rosemary
- 1/2 teaspoon garlic powder
Additional features
How to Make Cheese Garlic Herb Butter Snowflake Bread:
- Repeat the process to cut the other half of the dough. (Cut this piece into quarters and roll the balls in flat circles.)
- Now, place the first piece of dough on another parchment paper lined baking sheet.
- Rub the beaten egg and garlic butter and rubbed herbs on top. Next, we sprinkle the dough with a little pecorino cheese.
- Add another layer of dough on top, repeating this process two more times. After adding the fourth and final piece of dough, place the plate on top.
- Cut off the excess dough with a dough cutter, then remove the plate and any excess dough.
- Use your cookie cutter to press down the middle of the dough and create a circular footprint.
- Cut this snowflake bread just like you did with the first recipe. After twisting the pieces and forming the edges, brush the dough with beaten egg.
- Sprinkle dried rosemary, thyme, and a little extra cheese on top. Cover with saran wrap and let stand for fifteen minutes.
- Bake both buns with snowflakes at 400 degrees F for twenty minutes. When you’re ready, cut out a piece of snowflake and enjoy!
After all your hard work in the kitchen, you’ve definitely earned your slice of snowflake bread! Aren’t these loaves of bread just beautiful? They are almost too pretty to eat, in our opinion. However, the aroma of freshly baked bread will probably tempt your taste buds too much to have leftovers. Let us know what you think if you try it!