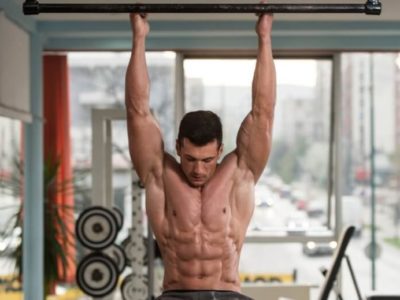
Of all the row variations you can do, the barbell row is my favourite.
It’s a fantastic compound exercise that trains almost all the muscles on the backside of your body and it allows you to lift much heavier weights than you can with most machine exercises.
That said, the barbell row can also be a brute of an exercise if you don’t know how to barbell row correctly.
This is why it’s essential that you learn proper barbell row form, which is what this article is going to teach you. Once you have that taped, there are many row variations and barbell row alternatives worth learning as well, such as the Helms row, the barbell seal row, and the barbell dead row.
In this article you’re going to learn the benefits of doing barbell rows, which muscles the barbell row trains, how to do barbell rows with perfect form (plus some useful barbell row cues), 12 of the best row variations, and more!
What Is a Barbell Row?
The barbell row is a back exercise that’s been a darling of top-level powerlifters and bodybuilders for decades.
There are several types of barbell rows, but the classic barbell row is typically performed in a bent-over position with your back parallel to the floor. To initiate the exercise, you push off the ground slightly with your legs to build momentum, pull the barbell toward the ceiling until it touches your lower chest or ribs, and then lower the bar to the floor.
Many people also refer to the barbell row as the “bent-over row, “barbell bent-over row,” or “bent-over barbell row,” but these are all just different names for the conventional barbell row.


Barbell Row Benefits
Upper back muscle and strength gain
The barbell row is particularly good for building muscle and gaining strength because . . .
- It’s a compound exercise that trains many muscle groups at the same time, which means it allows you to lift heavier weights relative to many other back exercises.
- It’s easy to progressively overload (add weight and reps over time), which is one of the best ways to maximize the muscle-building effects of weightlifting.
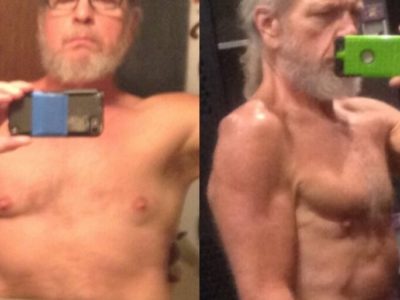
Improved posture
When most people talk about improving posture, they mean retracting the shoulders and pushing out the chest in order to counteract the rounded-shoulder, quasi-quasimodo look associated with office workers and phone-addicted zoomers.
And the barbell row can help correct this.
Improving your posture doesn’t just improve your appearance, though. Strengthening the muscles that support your spine and upper back also improves your ability to support heavy loads during exercises like the squat and deadlift, which allows you to lift heavier weights safely.
In other words, the barbell row not only helps you avoid looking like a praying mantis, it also bolsters your ability to do many other highly beneficial weightlifting exercises.
Increased strength on your weightlifting exercises
Having a strong back is essential if you want to lift heavy weights—you can think of it as the scaffolding that supports the rest of your body.
It keeps your upper body tight and prevents you from tipping forward in the squat, stops your back from bending in the deadlift, and creates a stable base during the bench press.
That’s why you’ll find the barbell row or other barbell row variations in any strength training program worth its salt, such as Starting Strength, Wendler 5/3/1, and my Bigger Leaner Stronger and Thinner Leaner Stronger programs.
Barbell Row Muscles Worked
Research shows that the barbell row is one of the most effective exercises for training all of the muscles of the back, including . . .
Here’s how all of these muscles look on your body:
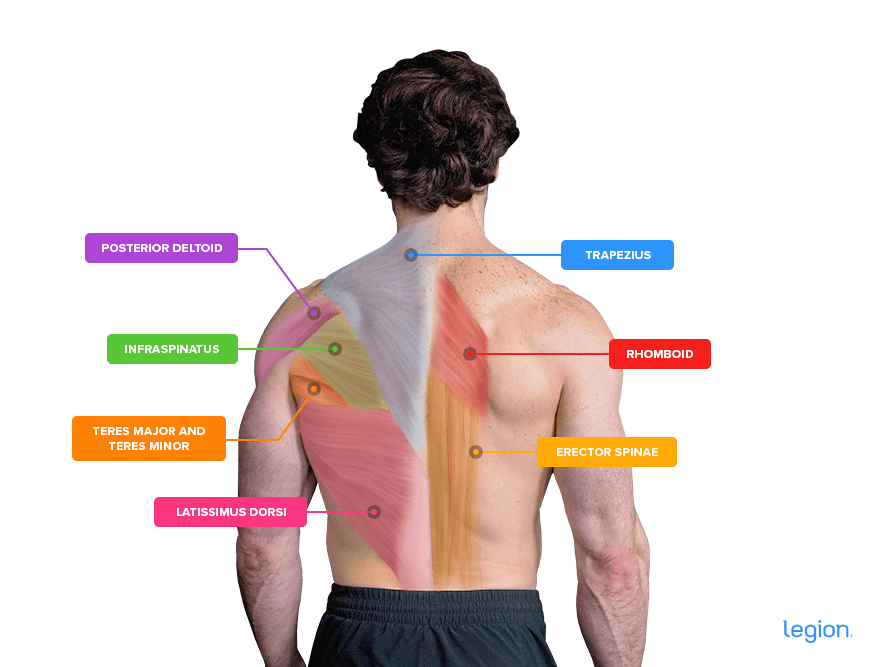
It also trains several arm and leg muscles (although to a lesser degree) . . .
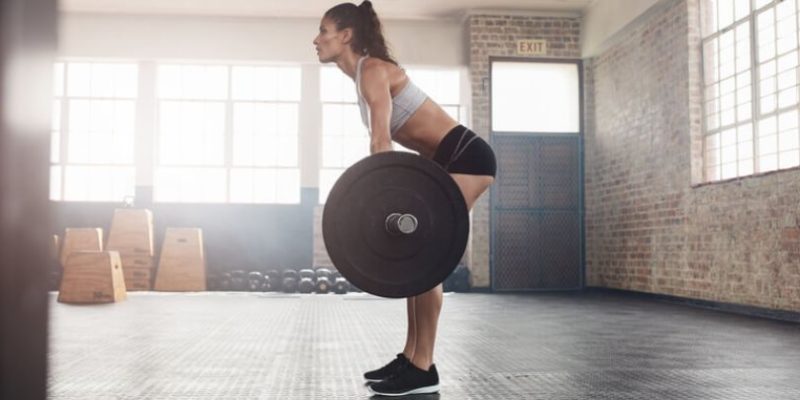
Proper Barbell Row Form
Every aspect of barbell row form—whether it’s barbell row grip, foot placement, back angle, or anything else—can be filed under one of three categories: setup, row, descend.
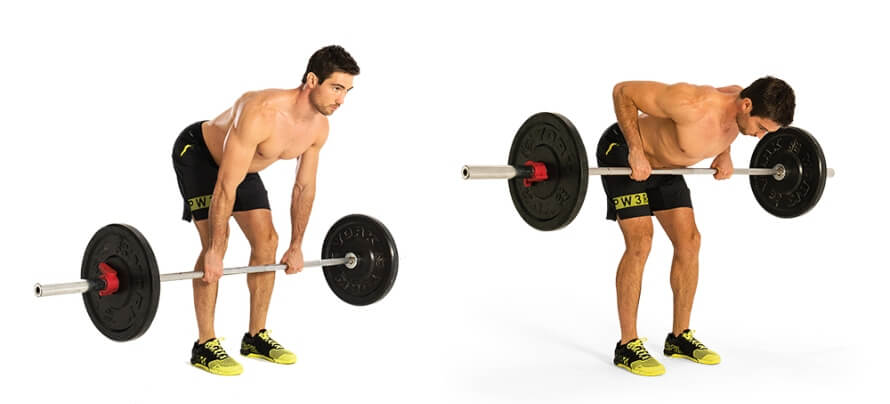
Step 1: Set Up
Load a barbell with the desired amount of weight. Walk up to the bar and position your feet about shoulder-width apart with your toes pointed slightly outward, and roll the barbell over your midfoot so that it’s about an inch away from your shins.
Bend over at the waist and grab the bar with a slightly wider than shoulder-width grip with your palms facing toward you, and squeeze it as hard as you can. Next, straighten your back and lower your hips until your back is roughly parallel to the floor.
Step 2: Row
Initiate the pull by driving through your legs to “pop” the weight off the floor. Then, using the momentum generated by your lower body, pull the barbell to your upper body, touching it anywhere between your lower chest and belly button.
Ensure your shoulders rise with your hips and your back maintains its flat, neutral position as you lift the bar (no “whipping” your torso backward to lift more weight or get more reps).
Here are some helpful barbell row cues for maintaining good form during the ascent:
- Slam your elbows into the ceiling
- Explode off the floor
- Rip the bar into your stomach
- Push your chest into the floor (helps prevent the urge to lean too far backward)
Step 3: Descend
While keeping your back flat and your core tight, reverse the movement to return the bar to its starting position on the floor. Quickly lower the bar toward the ground until your arms are straight, and then drop your hips enough to allow the weight to rest on the floor in one smooth motion.
Don’t try to lower the bar slowly or quietly. The entire descent should take 1-to-2 seconds or less. Take a moment to get in the proper starting position, then start your next rep.
The 12 Best Barbell Row Variations
You just learned how to do barbell rows.
In my opinion, it’s probably the best of all row variations, and what I’d recommend if I could only choose one.
Luckily, I don’t have to just choose one (and neither do you!). There are about a dozen other bent-over row variations worth learning, and you may find you prefer one or more of them to the conventional barbell row depending on your anatomy, mobility, equipment options, preferences, and injury history.
One downside of the conventional barbell row is that it also requires quite a bit of leg strength, which means it’s difficult to do properly if your legs are bushed from other exercises. Thus, these barbell row variations often work well if you want to continue training your back after your quads, hamstrings, and glutes are thrashed.
Pendlay Row
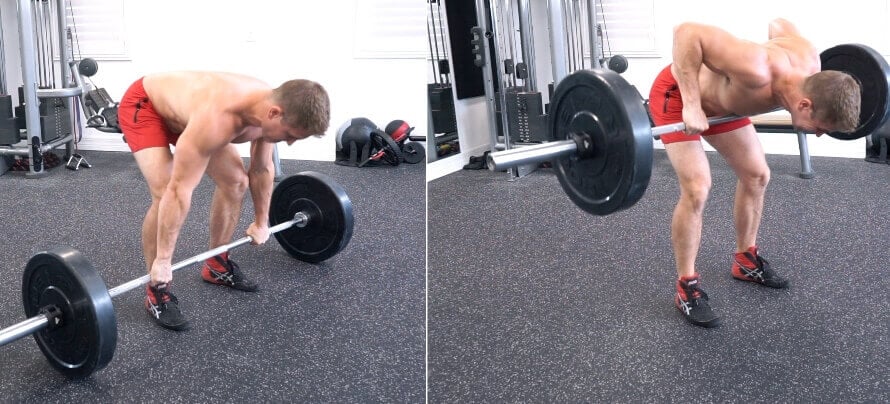
How to: Walk up to a loaded bar and position your feet about shoulder-width apart, with your toes pointed slightly outward. Bend over and grab the bar with a slightly wider than shoulder-width grip with your palms facing toward you. Straighten your back and raise your hips until your back is roughly parallel to the floor.
Pull the barbell to your upper body, touching it anywhere between your lower chest and belly button. Once the bar touches your body, reverse the movement and return it to the floor.
Why: The Pendlay row is similar to the barbell row, except you don’t use your lower body to help hoist the bar off the floor. This means you probably won’t be able to lift as much weight as you do with other row variations, but it also means your lats, traps, and rhomboids do more of the work and you aren’t limited by your lower-body strength.
Yates Row (Underhand Bent-Over Row)
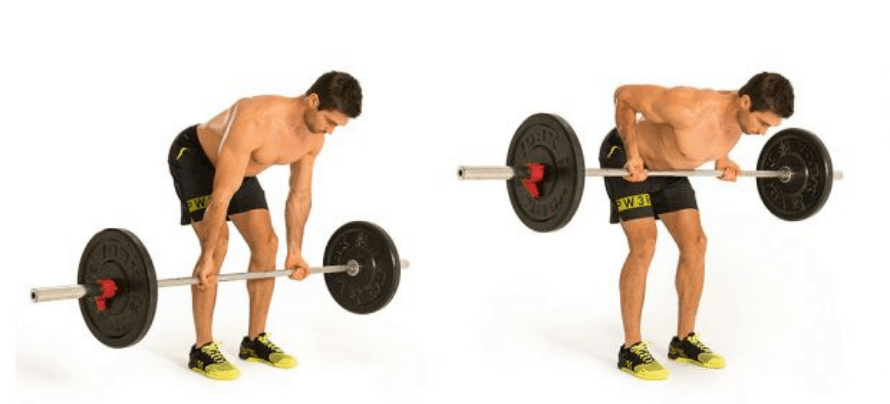
How to: Grab a loaded barbell with an underhand grip (your palms facing away from you) and hold it just below your knees. Without using your legs to build momentum, pull the barbell to your torso, touching it anywhere between the bottom of your rib cage and your belly button. Once the bar touches your body, reverse the movement and return to the starting position.
Why: Many bodybuilders—including Dorian Yates, the inventor of the exercise and six-time Olympia winner—believe the Yates row is superior to the barbell row at training the biceps, traps, and upper back. Many people also find it more comfortable as well.
Dumbbell Row
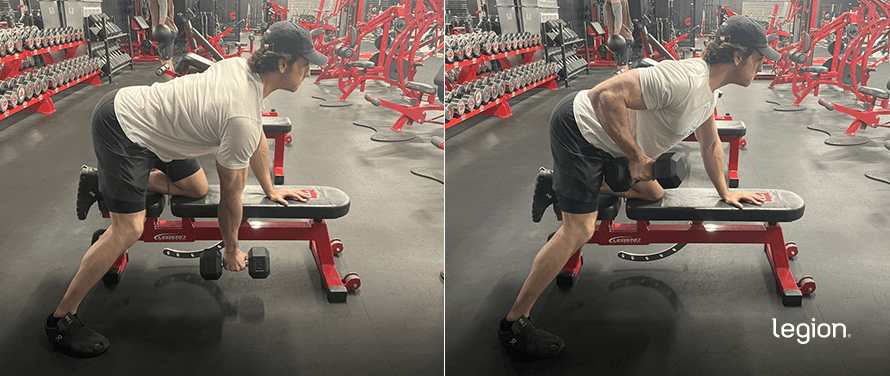
How to: Hold a dumbbell in your right hand. Bend over and put your left hand and left knee on a bench, chair, windowsill, etc. that’s about knee height off the ground. Keep your right foot planted on the floor and let your right arm (the one holding the dumbbell) extend toward the floor.
Keeping your back straight, pull the dumbbell upward until it touches your torso. Return the dumbbell to the starting position. Once you’ve completed the desired number of reps, repeat the process with your left arm.
Why: The main benefits of the one-arm dumbbell row are that it trains each side of your body independently and that you can lift slightly more weight with each arm than you can when doing the barbell row. (That is, if you can lift 200 pounds with both arms during the barbell row, you’ll probably be able to lift 105 pounds or so with one arm during the dumbbell row).
Seated Cable Row
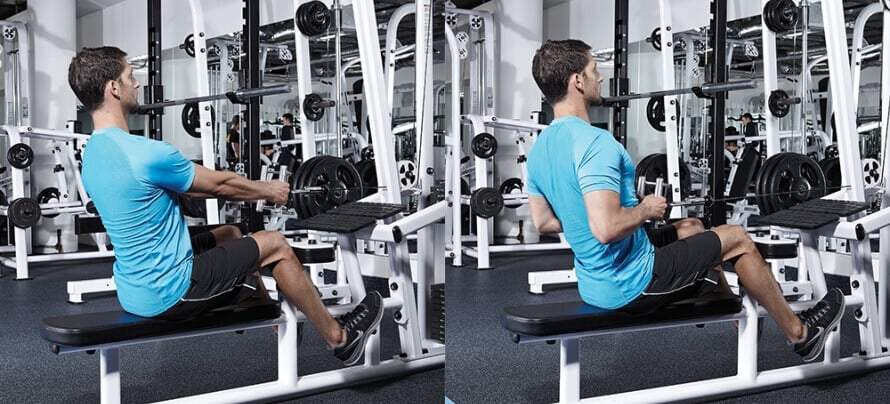
How to: Sit on the pad and place your feet on the foot rest while maintaining a small bend in your knees. Lean forward and grab the handle (you can use whichever handle attachment you want, put I like the close-grip “V” handle), then lean back with your arms stretched in front of you.
Straighten your back and pull the cable toward your stomach. Once your hands touch your torso, reverse the movement and return to the starting position.
Why: The main benefit of the cable row over other row variations is that by using a cable, there’s constant tension on your muscles throughout each rep. This taxes your back muscles slightly differently than other free weight back exercises.
T-Bar Row
How to: Place your feet on the T-bar row machine footplate, your chest on the pad (if there is one), and grab the handles. Lift the bar off the rest, then pull it toward your chest until your hands are at your sides. Reverse the movement and return to the starting position
Why: Since most t-bar row machines allow you to use a neutral grip (palms facing each other) instead of a pronated grip (palms facing down), the exercise trains your back muscles in a slightly different way than other row variations. Many people also find this grip more comfortable.
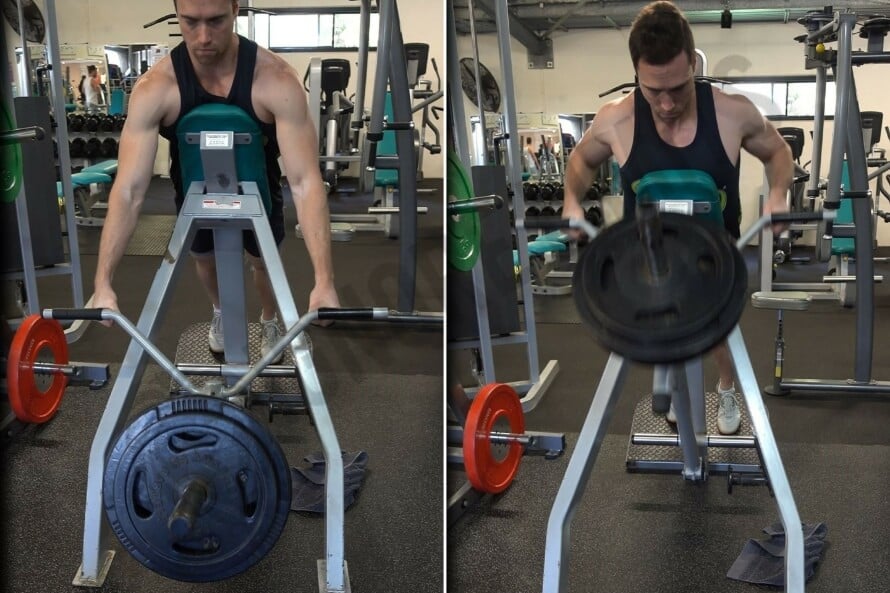
Barbell Corner Row (Barbell T-Bar Row)

How to: Place one end of an empty barbell in the corner of a room or squat rack and load the other end with weight plates. Straddle the barbell (facing away from the corner) and hook a close-grip handle from a cable row machine under the weighted end of the barbell.
Grab the handles, straighten your back, and slightly straighten your legs so you’re supporting the weight. Keeping your back mostly stationary, pull the bar toward your chest until the weight plate touches your body. Then reverse the movement to return to the starting position.
Why: The barbell corner row cut from the same cloth as the T-bar row. The only difference is you can do the barbell corner row without a T-bar machine, which makes it a good alternative for people who workout in a home gym.
Barbell Seal Row
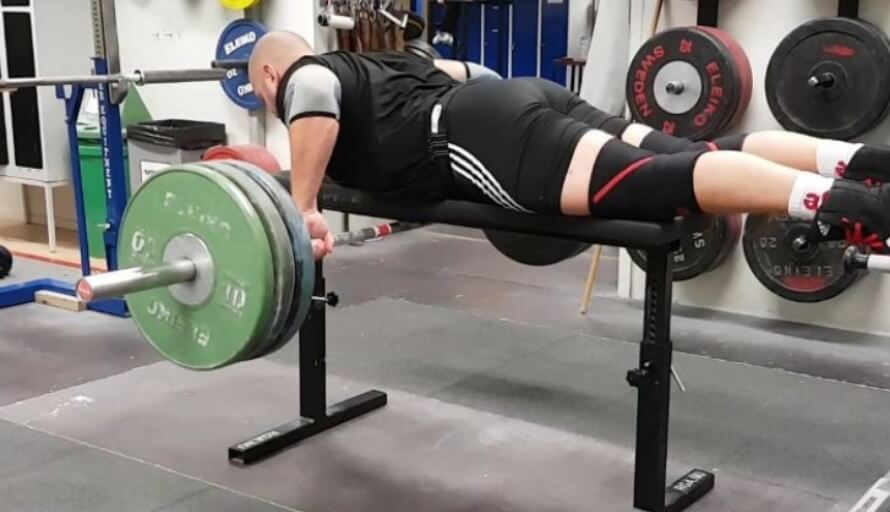
How to: Lie prone on a seal row bench and grab the bar with a slightly wider than shoulder-width grip and your palms facing toward your feet. Pull the barbell toward your upper body until it touches the underside of the bench, then reverse the movement and return to the starting position.
If you don’t have access to a seal row bench, set up a flat, non-adjustable bench on some plyo boxes or aerobics steps and follow the same procedure.
Why: Unlike with other barbell row alternatives, you can’t use momentum to help you lift the weight with the barbell seal row. This forces your back muscles to do more work, making this about as “pure” of a back exercise as you can do.
Helms Row
How to: Set an incline bench to roughly a 45-degree angle, then drape a towel over the top edge of the bench. Grab a dumbbell in each hand and rest your chest on the area of the bench that’s covered by the towel, allowing your arms to extend toward the floor. Pull the dumbbells upward until they’re by your sides, then reverse the movement and return to the starting position.
Why: Like the seal row, the Helms row forces your back and arms muscles to do all of the work. The Helms row is also easier to set up than the seal row and allows you to train each arm independently.
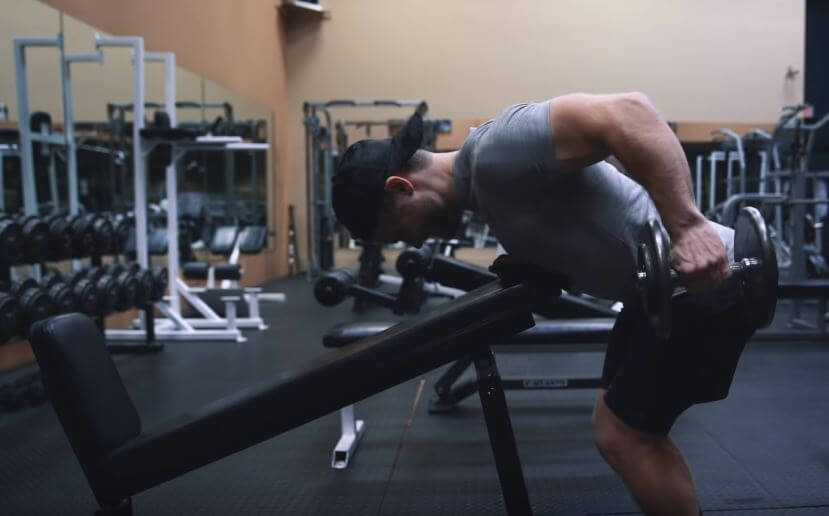
Chest-Supported Row
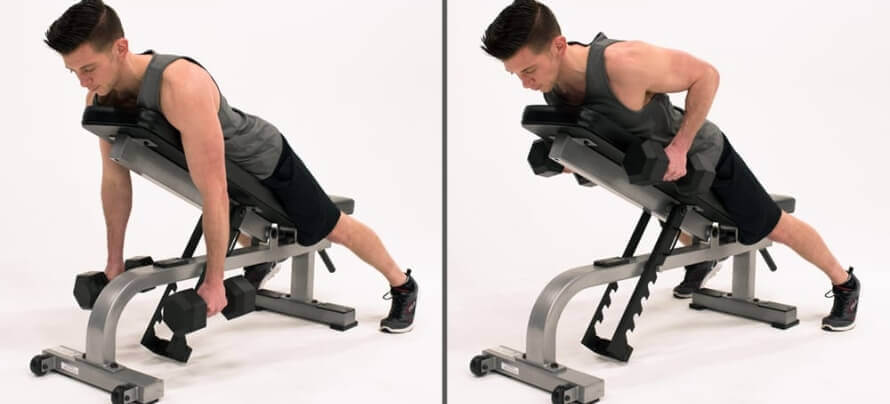
How to: Set an incline bench to roughly a 30-degree angle. Grab a dumbbell in each hand and lie prone on the bench with your feet on the floor and your arms extended toward the ground. Pull the dumbbells upward until they’re by your sides, then reverse the movement and return to the starting position.
Why: The chest-supported row prevents you from using momentum to “cheat” the weight up, which means your back and arm muscles do all of the work. Due to the way the bench is set up, it also forces you to pull at a slightly different angle than the barbell seal row and the Helms row, which trains your back muscles in a slightly different way.
Machine Row
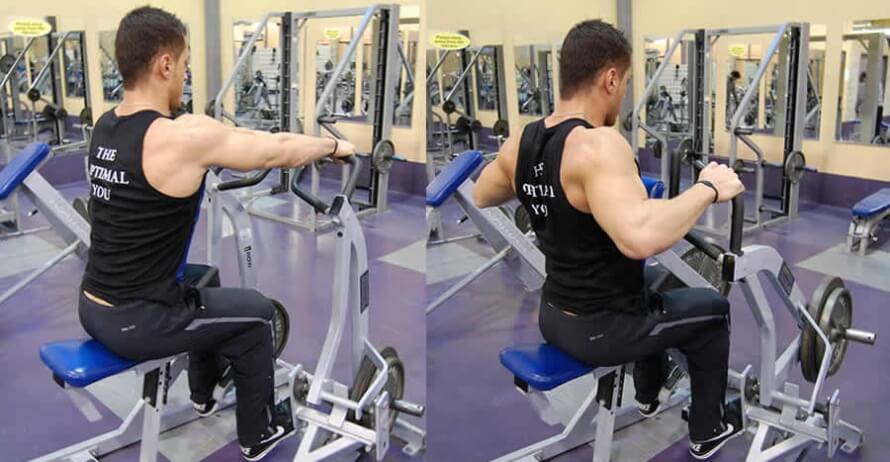
How to: Sit on the machine row seat with your chest resting against the chest pad. Lean forward and grab the handles, then pull them toward your body until your hands are by your sides. Reverse the movement and return to the starting position.
Why: The barbell machine row is less fatiguing than most other row variations, which means it’s a good exercise to use near the end of your workout when you’re feeling spent.
Inverted Row
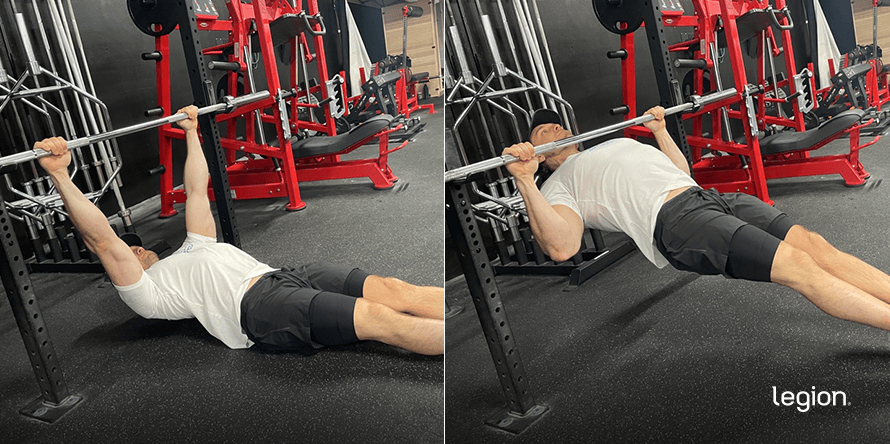
How to: Place a barbell in a rack so that it’s slightly more than arm’s length off the floor. Lie on the floor under the bar, grab the bar with a slightly wider than shoulder-width grip with your palms facing toward your feet and with your arms straight. Rest your heels on the floor and straighten your legs and back.
Keeping your back and legs straight and your butt high, pull your chest upward until it touches the bar, then lower yourself to the starting position.
Why: The inverted row is a good exercise for people who are new to weightlifting because you can do it at home and it’s easier than most other bent-over row variations. It’s one of the best exercises for preparing your body for more challenging row variations (like the ones on this list).
Barbell Dead Row
How to: Grab a loaded barbell with an overhand grip (your palms facing toward you) and hold it just below your knees. Without using your legs to generate momentum, pull the barbell to your torso, touching it anywhere between the bottom of your rib cage and your belly button. As soon as the bar touches your body, reverse the movement and return to the starting position. Once back at the starting position, allow the bar to rest for a second (come to a dead stop) before starting your next rep.
Why: Because the bar doesn’t rest on the floor between reps, the barbell dead row allows your lats to fully stretch at the bottom of each rep, which research shows may be beneficial for building muscle.
+ Scientific References
- Rindom, E., Kristensen, A. M., Overgaard, K., Vissing, K., & de Paoli, F. V. (2020). Estimation of p70S6K Thr389 and 4E-BP1 Thr37/46 phosphorylation support dependency of tension per se in a dose-response relationship for downstream mTORC1 signalling. In Acta Physiologica (Vol. 229, Issue 1, p. e13426). Blackwell Publishing Ltd. https://doi.org/10.1111/apha.13426
- HOLLY EDELBURG, B. S. ., JOHN P. PORCARI, P. D. ., CLAYTON CAMIC, P. D. ., ATTILA KOVACS, P. D. ., AND CARL FOSTER, P. D. ., & WITH DANIEL J. GREEN. (n.d.). What Is the Best Back Exercise? Retrieved May 4, 2021, from https://acefitnessmediastorage.blob.core.windows.net/webcontent/April2018/ACE_BackExerStudy.pdf
If you enjoyed this article, get weekly updates. It’s free.
Sending…
Great! You’re subscribed.
100% Privacy. We don’t rent or share our email lists.